Learn how to upload files directly from Power Apps to SharePoint Online without the need for SubmitForm, Power Automate, or anything else beyond a Power Fx formula.
Getting Started with Wrap for Power Apps on Android
📢 UPDATE (2/9/23): The native Wrap for Power Apps Wizard has gone live! Give that a go first.
Learn more on the Microsoft Power Apps Blog
(And come back here if it doesn't work out. 🙂)
Learn more on the Microsoft Power Apps Blog
(And come back here if it doesn't work out. 🙂)
The recently introduced wrap for Power Apps enables you to create low-code, end-to-end branded, and natively deployed mobile applications for your organization. The official documentation does a great job of laying out the steps required to get your first wrap for Power Apps going, but in this guide I'll set out those steps in the most efficient and painless process to get you going even quicker. Then we'll take it a step further by automating a lot of the button clicks using PowerShell.
Microsoft Power Apps: Identify Soon-to-Be-Deprecated Office 365 Connectors in Your Environments Using PowerShell
For the Time-Crunched:
Jump Ahead to the Script and Usage Instructions
What's Happening?
Back in August 2019, Microsoft announced the pending deprecation of several Actions and Formulas utilizing the Office 365 Outlook connector
If any of your Flows or PowerApps use any of the to-be-deprecated Formulas (eg: 'Send email', 'Get calendar', etc.) you will want to update them prior to their impending departure - or risk being left with broken PowerApp.
In a previous article, I covered how to identify any Microsoft Flows using the affected Actions and Triggers using PowerShell - if you haven't already, I highly recommend you give that a read to learn a bit of how PowerShell works and how we make it work for us in this scenario.
Once you've taken a look at that, come back here and I'll give you a run-through of how this new script works - since most of the same concepts covered in the other article were applied here.
Did you read it? Great! Let's continue...
To start, let's go ahead and give you the script that we'll be looking at today:
I'll steal a line from the previous article, since I think it's worth repeating:
If you're crunched for time, or simply have no interest in learning a very small bit of PowerShell, then you can jump ahead to the usage section.
If you're anything like me though, you'd want to understand what that thing That Stranger on the Internet gave you generally does before actually using it.
Especially one that looks across your entire Tenant using Global/Environment Administrator permissions!
As mentioned earlier, a lot of the concepts covered in the other article are applicable here - such as Arrays, Variables, Loops. For the sake of brevity, I won't restate those here.
Instead, I want to focus on the Logic that went into creating the script.
We'll start by identifying the initial challenge (Why even do this?), the proposed solution (What are we going to do about it?), and any performance considerations to keep in mind to accomplish this solution (How are we actually going to do it efficiently?).
The Challenge
When it came to Microsoft Flow, coming up with a solution was almost a necessity since (as of this writing) Microsoft does not yet provide us a way of exporting a list of Flows within a given Environment.This meant that, unlike PowerApps, you couldn't just download a report, filter by 'Office 365 Outlook' and start the process of going through each Flow that may* be affected. That ought to explain why I decided to start with Flow!
With PowerApps though, you can actually download a report of all of the PowerApps in an Environment, see what Connectors they are using - and determine that they may* be affected.
The astute among you would have noticed that I keep saying may* be affected. If you checked out the earlier article you'll read why. To restate:
*Why 'may'?
Because you'll notice that the 'Connection References' column only shows you that the Office 365 Outlook connector was used - but unfortunately doesn't tell you which of the many Actions or Triggers were used from it in the app.
When building our Flow script, I discovered that we can dig much further into the Flows to pull out only those that are definitely affected in some fashion - which should save you some valuable time in working through the affected Flows. This was relatively simple because the Flow PowerShell cmdlets actually returned the Actions and Triggers contained within them. Simply match them against the known deprecated list and tada!
But we're here to talk PowerApps! So enough about Flow!
Using the PowerApp cmdlets, we can determine what Connectors a PowerApp uses... but we can already do that through the Admin Center.
I want it to dig deeper and tell me that this app actually uses an affected Formula!
And that finally brings us to the challenge!
How do we look 'inside of' a PowerApp to see if it uses an affected formula? And once we figure out how to do that, how do we scale that to be able to look at possibly thousands without taking days to compute?
The Proposed Solution
If you've ever exported a PowerApp before, you'll know that once exported you are given an .MSAPP (eg: powerapp.msapp) file which you can use to backup/import the application as needed.
What some may not know, however, is that if you rename the file extension to .ZIP (eg: powerapp.zip) you can actually extract and explore the folder to see the content within it (including media, control and screen properties, etc.).
So what is our proposed solution?
If we can somehow download the App Package using PowerShell, extract the contents - specifically the Control and Screen properties, and then search those properties for affected formulas then we'll be in business!
Making it Happen
I spent some time digging around, but could not find a way to download the files through PoweShell. Luckily, I got the break in the case that I needed after reading this helpful post on the PowerApps Blog by Taiki Yoshida.
Namely, this portion of the post [emphasis mine]:
This action has a field called – “readonlyValue” which actually points to a link that stores the PowerApps msapp file. By combining the HTTP connector with this link, will allow you to retrieve the contents of the msapp file – thus, you can store your PowerApps backup to anywhere you want!
That put me on the scent of what I'm looking for - which for the curious was buried in the following property:
$_.Internal.properties.appUris.documentUri.readonlyValue
Obvious, right?!
Using this property, we are able to make what's known as a REST call to download the app package as a .ZIP file.
Once downloaded, we extract it to start to look inside of the folder and files - specifically those located in the 'Controls' sub-folder - to see what, if any, of those files include any of the affected formulas.
After identifying the files that include said formulas, we open them up further to actually get at the specific Screens/Controls and their respective properties to see exactly where we need to make changes.
Ultimately, we end up with a row that we add to a collection of affected PowerApps and export to Excel.
Making it More Efficient
All of the above is all well and good, but actually making it happen efficiently requires figuring out ways of progressively trimming down the items we are working with so that we're saving as much time as possible.
Especially when dealing with possibly thousands of PowerApps to check!
To do so, we simply take as big a bite out of the proverbial apple as possible each time we 'do' something.
At a very high level, the script accomplishes this as follows:
- First, we get a list of all of the PowerApps in a given Environment,
- Next, we check to see what, if any, of those apps are using the Office 365 Outlook connector,
- Then, we download the app packages of only those that may be affected,
- Next we do a cursory search through the raw text of those applications to find those that include the Formulas being affected,
- And Finally, we look deeply at only the files identified above to give us the final line item to place in our report.
Each time we move onto the next set of steps we are working with less and less 'things', making the task at hand smaller and smaller.
We could further improve on this by turning some of those processes into sub-processes (meaning we can run multiple at the same time), but that is well outside the scope of this post and was not implemented here.
In Closing
I hope this post was useful in helping you both understand what the script is doing, in addition to how you can think of things 'programatically' to accomplish large tasks more efficiently.
While the script provided could almost certainly be refined further, you do ultimately end up crashing into the rule of diminishing returns eventually.
Check out the PowerShell script usage instructions for help getting this script running.
As always, feel free to leave a comment down below if you have any questions or run across any issues.
PowerShell Script Usage Instructions
- Download the script (link).
- Run PowerShell ISE (or PowerShell) as an Administrator to install needed modules.
- Log in using your Global/Environment Administrator credentials to look across all Environments for affected PowerApps.
- By default, the report will be placed in a (automatically created, if necessary) folder at 'C:\PowerPlatformReports\PowerApps'. It will also be automatically launched for convenience
Notes
- The 'affectedPowerAppScreens' and 'affectedPowerAppControls' show you all of the Screens and Controls (if any) that are affected.
- Each of these is semi-colon (;) separated and in the format of:
- [Control/Screen Name] - [Property] - [Formula Used].
Microsoft Flow: Identify Soon-to-Be-Deprecated Office 365 Connectors in Your Environments Using Powershell
For the Time-Crunched:
Jump Ahead to the Script and Usage Instructions
Did you feel that?
It was the collective shudder throughout the Power Platform community as they came to grips with this week's announcement from Microsoft regarding the deprecation of certain actions in the Office 365 Outlook connector.
Like a large tremor out in the deep ocean, the impact of this notice may not strike you immediately. But the inevitable wave has been put in motion and will reach the shore soon enough.
Thankfully, Microsoft does provide us the tools to plan for and mitigate the effects of this change - you may just have to dig a bit to find them - and this post has been created to help guide you through doing just that.
Together, we'll weather the storm and you may even learn some PowerShell along the way!
What's Happening?
I'll leave it to the previously mentioned announcement for the nitty-gritty details, but the watered down version is if any of your Flows or PowerApps use any of the to-be-deprecated Actions or Triggers (eg: 'Send email', 'When a new email arrives', etc.) you will want to update them prior to them riding off into the sunset and leaving you with a broken Flow/PowerApp.
For an individual user, this is easy enough as chances are you have a decent grasp of what your Flows and PowerApps do (and thus, which Actions/Triggers they use). For you, simply go into those Flows and PowerApps and change any to-be-deprecated Actions and Triggers to their associated new actions (which are conveniently laid out in the announcement).
For a Power Platform Administrator? Things are a bit murkier as they'll need to not only account for their creations - but also all of those in the Environments they oversee. Yikes!
Plan
For a change of this magnitude, we'll want to establish a plan of attack to help reduce the number of future headaches.
If you just want to follow one I conveniently made up on the spot, then here you go!
- Plan: That's what we're doing here!
- Identify: Identify the affected Flows and PowerApps.
- Notify: Notify the affected Owners of those Flows and PowerApps.
- Communicate: Communicate to the Makers in your Organization so that they can begin/continue using the new Actions and Triggers going forward.
- Monitor: Keep an eye on your Environments to make sure any new Flows and PowerApps don't use these deprecated Actions and Triggers.
For the sake of brevity, I'll cover the first two bullets in this article and perhaps branch it out into the remaining bullets as time permits later on.
Identify
If you're a Power Platform Admin, then you may already know that the PowerApps/Flow Admin Center can provide you a list Environments and the Resources (PowerApps/Flows) within them.
You can even export a list of all of the PowerApps in that Environment! Convenient!
To do so, simply:
- Go to the Admin Center,
- Select an Environment,
- Click on the Resources tab,
- And click on the 'Download list' button on the right-hand side.

That'll get you a CSV report of all the PowerApps in the Environment.
Open the file, press 'Ctrl + T' to turn the data into a Table (you'll want to resave it as an Excel file at this point) and then look closely and you'll notice the column titled 'Connection References'.
Search for 'Office 365 Outlook' and apply the filter to give you all of the PowerApps that may* need to be updated!

*Why 'may'?
Because you'll notice that the 'Connection References' column only shows you that the Office 365 Outlook connector was used - but unfortunately doesn't tell you which of the many Actions or Triggers were used from it in the app. But it's progress nonetheless!
For now, let's take that small victory and move on to identifying any Flows that use the Office 365 Outlook connector.
The eager amongst you may have already realized that, when you click on 'Flows' for the Environment, you are provided a list of all the Flows - but no way to export them! Inconvenient!
While this could have been disastrous, luckily for us we can turn to an old friend of mine for help in solving this dilemma - PowerShell!
For the code-averse, please don't tune out! The basic structure and logic is very simple for this scenario (and I'm happy to walk you through it).
Not convinced? What if I simply gave you the script in its entirety for you to just run and be past this? You drive a hard bargain, so here you go!
PowerShell Script Overview
If you're crunched for time, or simply have no interest in learning a very small bit of PowerShell, then you can jump ahead to the usage section.
If you're anything like me though, you'd want to understand what that thing That Stranger on the Internet gave you generally does before actually using it.
Especially one that looks across your entire Tenant using Global/Environment Administrator permissions!
Hopefully your conscience has now given you no other option than to read on, so let's dive in! I promise it'll be relatively painless (and for the most-part very high-level).
To start, go ahead and open up PowerShell ISE, making sure to right-click on it to run it as an Administrator (you'll see why in a moment).

If you haven't already, download the script provided above and navigate to its save location to open it in PowerShell ISE.
You should now be looking at something like this:

Quick Note: Anytime you see 'Write-Host', it's there to simply show a message in the console to let you, the end-user, know what's happening at that given moment in the script. It serves no other functional purpose. Also, lines beginning with Hashtags (#) are comments to let you know what that piece of the script does (a good habit to get into!).
Moving on, the very first set of lines load the Modules we'll be needing in order for this script to function. These 'Modules' hold the 'cmdlets' we run later on. To install modules, you'll need to run PowerShell as an administrator (hence why I asked you to do so earlier). If you run into any errors on this step that'd be a good place to check first to resolve it.
A good analogy for those coming from PowerApps is that a Module acts as a Connector (eg: 'Office 365 Users') and a cmdlet acts similar to an Action/Function in that is the action we get from the the Connector (eg: 'Office365.SendEmail()').
Like PowerApps, in PowerShell some cmdlets are built in and don't need to be installed (eg: 'SubmitForm()', 'Write-Host') - but others need to explicitly loaded to become available for use. In this case we are installing three modules, all provided by Microsoft. The first two will allow us to interact with our Envirionment(s) and the last one will allow us to get information from our Active Directory (you'll see why later on).
The next two sections, as their comments imply, create two Array variables (or 'Collections', in PowerApps parlance) for us to use as references for filtering further down.

PowerShell has many different ways to initiate arrays depending on their intended use. Without getting too technical, the method used on these lines ( by using '@( )' ) creates an array of a fixed size for us (meaning we can't Add/Remove from it - at least not directly). Since we don't need to do that with these, that won't be a problem here.
You'll also notice that the name of the variable is prefixed with a dollar sign ('$'), followed by the name we want to give it, what we're doing with it ( '=' ), and finally what we're setting it to.
Moving on, the next section creates another variable for us ('$appEnvironments') and sets it to the output from the cmdlet 'Get-AdminPowerAppEnvironment'. When this cmdlet is run, it will prompt the user to provide their credentials and then return all the Environments that account has access to.
Below that section is another where we establish a connection to the Azure Active Directory (AzureAD) - we need to do this ahead of time because later on we'll want to call upon it to resolve user names and emails.
Finally, we're on the last bit of 'warm-up' before we finally start really doing something. In this piece we are again initiating another array (an empty one for now) - but this time we're prefixing the variable name with '[System.Collections.ArrayList]'. Unlike earlier, initiating an array in this fashion allows us to directly Add/Remove from it as needed - which we will definitely need for this!
Ok! Did you make it this far? Excellent, because now we're into where the real fun stuff is happening. Let's speed on through!
We've now come across the first Loop we're be going through - in PowerShell, we do this by using a 'ForEach'.
Breaking the rest of this line apart you'll see the common syntax needed to get us going. Inside of the parenthesis, we're saying "For each object/record inside of '$appEnvironments', give me an object/record called '$environment' to work with".
As some of you may have already guessed, the '$environment' variable is a temporary variable with all of the properties of that Environment (including its name). The curly brackets after the close-parenthesis simply signify the start the actual 'stuff' that we'll be doing 'for each environment'.
Right off the bat, the script wants to let you know which environment it is currently working on - to do so we use the Write-Host cmdlet, followed by a string, and finally use the temporary variable mentioned above followed by '.DisplayName'.
Note: To get to a variables properties, you can follow it with a period ('.') and the name of the property.
Next we want to create yet another array - this time only within the context of this particular loop - and set it to the outcome of the cmdlet 'Get-AdminFlow'. You can probably figure out that this line is retrieving a collection of all of the Flows (that the logged-in user has access to) for the given environment. We tell it what environment by adding the '-EnvironmentName' parameter followed by the DisplayName property of our $environment variable.
Skipping forward a bit, I'll quickly note that the section commented as 'Initialize Counts for Progress Bar' does just that - but I'd be lying if I said I had a complete understanding of how exactly it does it. Truth be told, this is one of those formulas I stumbled across long ago and added to my toolbelt for future use. If I ever recall where I got it from I'll be sure to give credit where credit is due!
One thing that I do know that's happening there, however, is we are creating a variable arbitrarily named '$t' and setting it through some fancy logic that effectively says:
"Give me the Count of Flows inside of '$allFlows' that include Actions or Triggers inside of the '$deprecatedActions' or '$deprecatedTriggers' arrays."
Next we check to see If, for this environment (remember we're still inside of that first Loop), we actually found any Flows that met that criteria.
If so, we will then start another Loop through each affected Flow ("For each affected flow, give me a temporary variable '$flow' to refer to."):

Otherwise ('Else') we'll just tell the user that there were no affected Flows:
Jumping back to the nested loop, you'll see that we are creating a temporary PowerShell Custom Object with all of the Flow properties we care to put out into our report.
I'll leave it to you to dig into them further, but I'd like to call out the two properties 'flowCreatorUsername' and 'flowCreatorEmailAddress'.
Through testing, I discovered that the provided cmdlets used earlier return all of the Flows - but rather unfortunately the properties included in them do not include the creator's name or email address - which are absolutely crucial for any meaningful report.
Thankfully, they do return a property 'userId' - which, if you noticed, we use to query Active Directory and resolve the desired properties.
Again, explaining this piece fully is probably outside of the scope of this article, but in simple terms this is doing a couple of things which can best be summed up as this:
"Give me the username/email address of the user whose ID matches this, and if none is found set this property to 'None/Not Found' instead (of erroring out)."
Once we've got this Flow's properties sorted out, we add this Flow to our earlier-initialized array $affectedFlows and then do some more progress bar witchcraft.
One other thing to point out, the array $affectedFlows was initiated and exists outside of both of the Loops we've gone over.
This means that once we've gone through and added each affected Flow inside of each Environment to it....

... we can finally spit it all out into a report!
I'll breeze through this portion, but you can probably take it apart fairly easily.
This last set of actions:
- Creates a full filepath for the report, including appending the current time to the filename so that you don't accidentally overwrite any previously written reports.
- Checks to see if the target folder (in this case, 'C:\PowerPlatformReports\Flow') already exists - and if it doesn't it will create it (otherwise the Export function will throw an error).
- Most importantly, it takes our now full array '$affectedFlows', sorts them by the flowID, and exports it to the filepath created above as a CSV file.
- And lastly, uses the Invoke-Item cmdlet to launch the report (and save you a button click).
Whew! That was certainly a lot to run through, but you made it!
To recap...
PowerShell Script Usage Instructions
- Download the script (link).
- Run PowerShell ISE (or PowerShell) as an Administrator to install needed modules.
- Log in using your Global/Environment Administrator credentials to look across all Environments for affected Flows.
- By default, the report will be placed in a (automatically created, if necessary) folder at 'C:\PowerPlatformReports\Flow'. It will also be automatically launched for convenience.
In Closing
For those of you completely new to the world of PowerShell, I hope this post didn't scare you off completely. The cmdlets available in PowerShell (for a wide-variety of platforms) provide you with a near-infinite amount of capabilities once you start to get a grasp on it. Also, the language itself is very forgiving and generally human-readable. I'd highly encourage you to take a deeper look at it and see what use it may serve you (especially any admins out there reading this!).
Admittedly, I didn't go into every detail in the provided script, but I do think I've covered enough to give you (and your System Administrators) some peace of mind that this script from That Stranger on the Internet won't take down your entire organization. At least not on purpose!
If you come across any errors or issues, or have any PowerShell functions I'm not aware of that are more efficient to use in place of these - please do drop them in the comments and I'd be happy to listen!
If you come across any errors or issues, or have any PowerShell functions I'm not aware of that are more efficient to use in place of these - please do drop them in the comments and I'd be happy to listen!
As mentioned earlier, I may follow up this post later with ideas on how to handle the other bullets of my 5-part plan to handle this situation (especially considering I will indeed be having to deal with it regardless).
One final point, this post only touched on identifying Flows that will be affected by this change. I will soon be posting a follow-up to help you identify PowerApps that will also be affected. This will not only give you PowerApps using the Office 365 Outlook connector (which you can already get from the Admin Center) - but will also filter those down to any PowerApps that are actually using the affected functions ('SendEmail()', etc.). Exciting!
Power Apps: Apply Multiple Filters to a Gallery
Learn how to filter PowerApps Galleries using multiple filter selections without running into delegation warnings.
Introduction:
When working with Gallery components in PowerApps, often a common ask is to be able to filter the items displayed inside of that gallery based on a filter selection field - such as a Dropdown or Text Input component.
While filtering off of a single dropdown is simple enough, when you wish to filter based on multiple filter selection fields things can begin to get messy quite quickly.
One of the issues you can run into, depending on your Items formula, is delegation warnings - also hereby known as the 'Blue Squiggles of Impending Doom' ('BSID').
I'd direct you to Microsoft's very helpful Understand Delegation in a Canvas App article for more detailed guidance on the subject, but for convenience I'll highlight the following line from that article as it most succinctly sums up what delegation helps you accomplish:
"The key to building efficient apps is to minimize the amount of data that must be brought to your device."
Without getting into the weeds too much, Delegation effectively passes your query parameters to your Data Source (SharePoint, SQL, CDS) and has it do the grunt work of actually generating the results - which it then passes back to PowerApps.
Why Does This Matter for Filtering?
By default, PowerApps has a limit for the number of items it will query from a data source when using 'non-delegable' functions to the first 500 items in the Data Source.
This effectively means that when you pass a non-delegable query to a data set of more than 500 items, the query is actually only being run against the first 500 items of that data set. If the result you're looking for happens to be item number 501, 502, 503, etc it will not be returned.
You can go into the Advanced Settings in PowerApps to bump this number up to 2,000 - but ultimately, if you are going to be dealing with large data sets you want to make as many of your functions delegable as possible.
Request:
Have the ability to filter a Gallery based on one or more Dropdowns, each with their own Checkbox that determines whether to apply the selected filter criteria or not.
Also, accomplish this through a completely delegable function.
Also, accomplish this through a completely delegable function.
Solution:
With that lengthy introduction out of the way, let's actually get into the solution to the problem proposed.
Before that, however, I'd like to point out that this method assumes that you want to display values in the dropdowns regardless of whether they exist in the Gallery in that moment - which may or may not already have other filters applied. There is a solution to this, but that is an article for a different day.
Ingredients:
For this example, we'll need:
Note: Sample names provided for each for the sake of following along, feel free to change as required.
- 1 Collection ('colCustomerContacts', for use in the gallery)
- Items Sample Schema for Reference:
 | |
|
- 2 Dropdowns
- 'fldCompanyNameFilter'
- 'fldJobTitleFilter'
- 2 Checkboxes
- 'chkApplyCompanyNameFilter'
- 'chkApplyJobTitleFilter'
- 1 Gallery
- 'galCustomerContacts'
Instructions:
If you're following along using the sample schema provided, on your two Dropdowns you'll want to set the Items and OnSelect properties as follows:
- fldCompanyNameFilter:
- Items: Distinct(colCustomerContacts, CompanyName)
- OnSelect: Reset(chkApplyCompanyNameFilter); Set(filterCompanyName, Blank() );
- fldJobTitleFilter:
- Items: Distinct(colCustomerContacts, JobTitle)
- OnSelect: Reset(chkApplyJobTitleFilter); Set(filterJobTitle, Blank() );
They should end up looking something like this:

For the two Checkboxes, we'll want to modify both the OnCheck and OnUncheck properties as follows:
- chkApplyCompanyNameFilter:
- OnCheck: Set(filterCompanyName, fldCompanyNameFilter.Selected.Result);
- OnUncheck: Set(filterCompanyName, Blank() );
- chkApplyJobTitleFilter:
- OnCheck: Set(filterJobTitle, fldJobTitleFilter.Selected.Result);
- OnUncheck: Set(filterJobTitle, Blank() );
Note: The bolded section of the OnCheck formulas ('Result') will vary for your own applications depending on the Items value of the given dropdown. Update this accordingly.
Ultimately, they should look something like this:

Finally, we'll set the Items property of our Gallery to the following:
- galCustomerContacts:
- Items: Filter(colCustomerContacts, IsBlank(filterCompanyName) || filterCompanyName = CompanyName, IsBlank(filterJobTitle) || filterJobTitle = JobTitle)
Which should look like this:

Putting It All Together:
I'll try to explain how all of these pieces ultimately come together to fulfill our requirements as simply as possible. Before doing that, however, let me show you how I decided to lay out this app:


The Dropdowns provide the Filter selections for us to use, which in this case are the distinct values from the given columns of our data source.
The Checkboxes provide a mechanism for controlling whether the filters are applied or not - and also what values to filter by.
By setting the value of the Variables ('filterCompanyName' & 'filterJobTitle') to the selected item, we are subsequently able to use them in our Gallery's Filter() function. Also, when OnUncheck is triggered we are able to clear those variables.
Finally, the Items property of the Gallery uses the Filter() function to determine what items to show.
If you look closely, you'll notice that we are giving the Filter function only two Logical Tests to perform that will give us the desired results - even though we're testing four separate things (2 for each logical test).
Also important to note is that the Functions were using for those logical tests (IfBlank() and ='s) are delegable functions!
What We're Effectively Saying (to the Data Source) Is:
Logical Test 1: (IsBlank(filterCompanyName) || filterCompanyName = CompanyName)
If filterCompanyName is blank (then I don't care to use it as a filter) - otherwise, get me items where the CompanyName matches filterCompanyName.
Logical Test 2: (IsBlank(filterJobTitle) || filterJobTitle = JobTitle)
And while you're at it, If filterJobTitle is blank (then I don't care to use it as a filter) - otherwise, get me the items where the JobTitle matches filterJobTitle.
One last thing to callout that I haven't already, if you go back up to the Dropdown setup you'll notice that we did a couple of things in the OnSelect property of each. Namely, we Reset() their respective checkboxes and Set() the associated variable to Blank().
The reason we do this is simply because if you've already checked the box (and thus set the filter value) and then subsequently change the dropdown's selection without unchecking/rechecking the box - you'll be left with an unchanged filter variable (which relies on the OnCheck property being triggered). By using this method, we are gently nudging the user to recheck (the now unchecked) box whenever they click on the Dropdown to keep everything working as expected. There may be other ways to accomplish this, but for now this works.
Wrap-Up:
For those of you who hung in there to read this entire post - thank you! At the end of the day, actually implementing this functionality isn't nearly as complicated as trying to put it to words (and pictures).
Feel free to comment below with any questions or issues you may uncover when implementing this.
SharePoint Online: Give Your Modern News Web Part Title The Boot!
This one's a really simple problem that was brought to me recently with just as easy a fix (and may or may not just be an excuse to show off some cute penguins...).
Scenario:
You've added a News Web Part to your modern SharePoint page and have decided that you don't want a title to display on the web part.That's easy enough, right? Simply remove the text from the title and click publish!
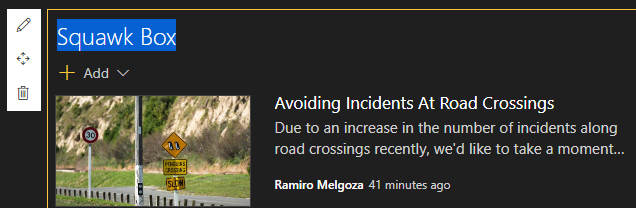
(Let's use our imagination to visualize me clicking the backspace key...)

... hmm. It looks like the default 'News' title sticks around. Go ahead and click 'Publish' to verify if you'd like.
Now, you might think that you can try the old 'hit space to trick SharePoint to thinking there's something in there' trick - but that won't work (believe me, I tried...).
The more technically-savvy among you might even try to use 'Alt-0160' to create a non-breaking space instead. No dice.
So then I guess that's that, right? Nope!
Solution:
Through sheer persistence (read: stubbornness), I was able to determine that we can in fact trick SharePoint into thinking a character exists to prevent it from showing a title.The trick? Get a blank character from the Character Map!

Simply open up the Character Map, find yourself the empty character called 'U+200E: Left-To-Right Mark'.
Click 'Select' to select it and then click 'Copy' to copy this ghost character to your clipboard.
Go back to your SharePoint page and press 'Ctrl+V'.

... you'll see it's gone for good!
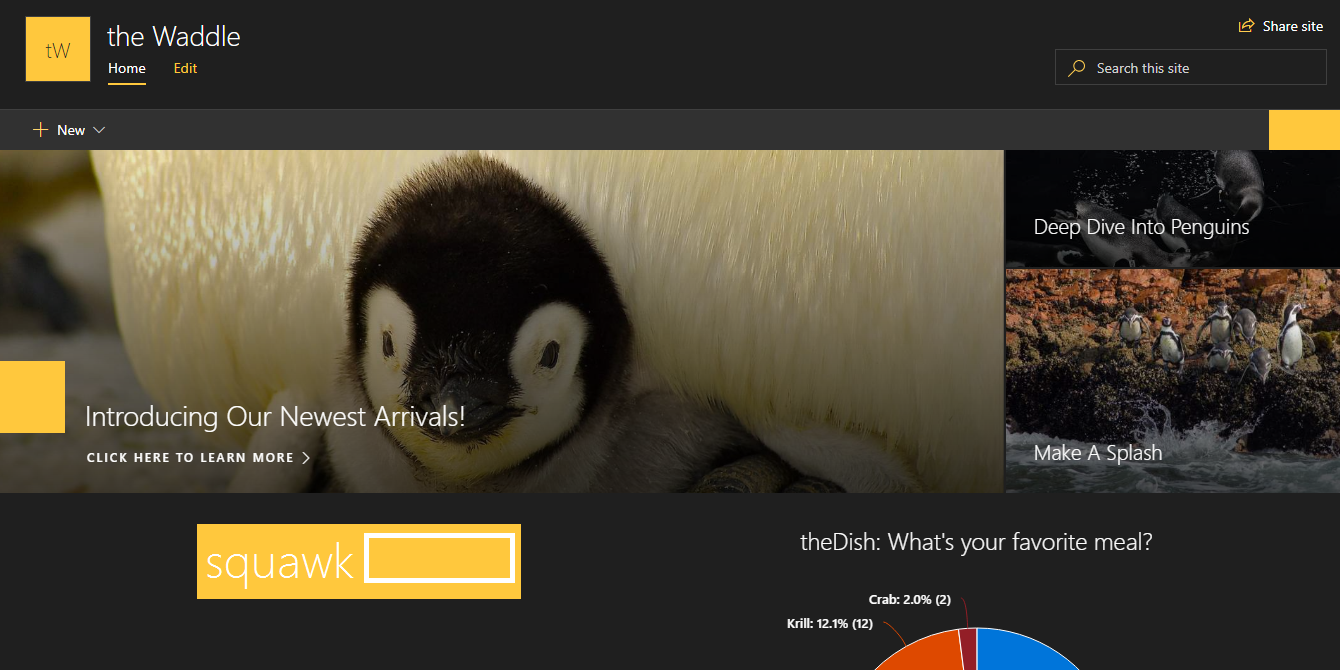
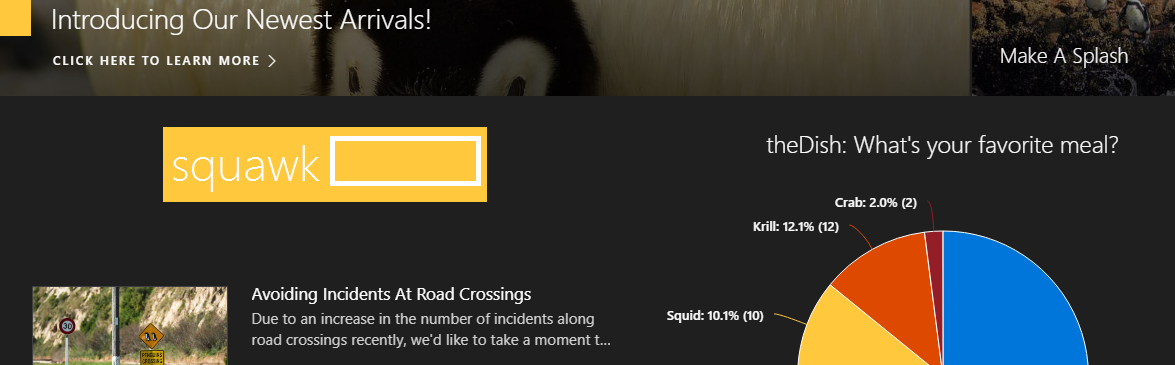
In my case, I wanted to draw a little more attention to my News Web Part with a banner.
To do this I simply add a normal Image Web Part right above it and voilà!
Thanks for reading!
Feel free to leave a comment below if you run into any troubles with this or any other Office 365 features.
Microsoft Flow + Cognito Forms: Error uploading Form attachments to SharePoint Online
This post is decidedly more product-specific, but hopefully it will help someone out there facing the same issue that is looking for an easy fix.
The Problem:
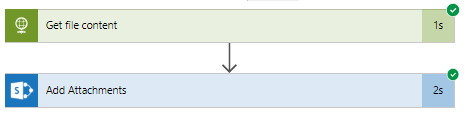
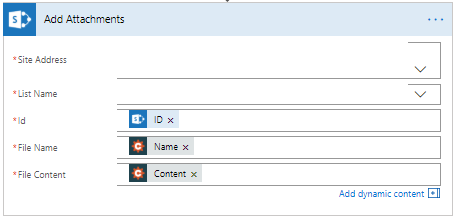
The Flow is simple enough, it takes a submitted Cognito Form, does a handful of things, and ultimately populates a SharePoint List with the form information and attaches the form attachments to the list entry. This works exactly as expected for most forms submitted - assuming the files don't exceed a certain combination of size and quantity (which I didn't have time to nail down specifically during troubleshooting).Under most circumstances, the following Flow action would work just fine:
However, when the planets align just so, you get this instead:

The Solution:
What the error is basically telling us is the Content attribute of the Cognito Forms attachment is empty.We can verify this by checking the output of the Flow Trigger ('Cognito Forms: When a new entry is updated') to see what a working example looks like versus a failed run.
Here's what we get:
| Working | Not Working |
 | 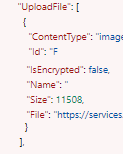 |
Thankfully, the Cognito Forms trigger does provide us with an attribute called 'File'. This is a direct link to the attachment (that expires after a certain length of time) which we can use to retrieve the file content ourselves! How do we do that?
With an HTTP GET action!
Simply place an 'HTTP' action before the 'Add Attachments' action like so:

The Output ('Body') of this action will be the attachment - which is returned as an Object (which, after a lot of banging my head on the desk trying to convert this to something else, is actually exactly what we want!).